PRIVACY & PLATFORM CONNECTIONS
Privacy notice
Last updated: 22 November 2026 · Version 1.0
This notice covers the StreamCendra website, account area, Mod Console and the Google/YouTube and Twitch integrations of the desktop version described here. Real sign-in and public installer downloads are currently disabled. The preview uses labelled example data; the account and live features described below process real platform data only once enabled and connected by you.
Controller and hosting
The controller is Pos-IT e.U., owned by Benjamin Pos, Herbststraße 71-75/8/2, 1160 Vienna, Austria. For privacy questions and data subject requests, contact
office@pos-it.at. Further details are available in the
Pos-IT e.U. legal notice.
The website and its reverse proxy run on servers operated by Pos-IT e.U. in Austria. Google/YouTube and Twitch are separate services: connecting a platform sends requests to that service and may involve processing outside Austria.
Website visits and technical logs
When you visit, the web servers process your IP address, time, requested address including submitted URL parameters, HTTP status, transferred data volume, and device, browser and referrer information sent by your browser. This is used to deliver, troubleshoot and secure the website. Access and error logs rotate daily and retain 14 archived daily files plus the current file. Necessary extracts relating to a specific security incident may be retained separately until the incident and any resulting claims are resolved.
Which data is used?
For Twitch, we read the unique account ID, display name and channel name. For YouTube, this includes the channel ID, channel title and, where available, public handle. We also process an internal StreamCendra identifier, your chosen display name, account links, technical session data and granted OAuth permissions with access and, where applicable, refresh tokens. A platform display name may be a real name. Sign-in does not request email access; passwords remain with the platform. If you contact us by email, we receive your sender address and the contents of your request.
Depending on your permissions, connected live features process channel and broadcast IDs, stream titles and live status, live chat IDs, messages with timestamps and author IDs, display names, and available role, membership and verification indicators. Team management and moderation also involve channel assignments, team roles, the source and validity of permissions, question assignments, and action and result data. The website does not transmit or archive audio or video streams.
Purposes and legal bases
We use this data for sign-in, account identification, platform links you explicitly request, chat display, question management, role verification, and chat or moderation actions you initiate. Matching names never link two accounts automatically. Processing necessary for requested account and service features is based on Article 6(1)(b) GDPR. Security and abuse prevention rely on Article 6(1)(f) GDPR; our legitimate interest is a secure, functioning service. Where optional additional processing relies on your consent, Article 6(1)(a) GDPR applies. Legal obligations are handled under Article 6(1)(c) GDPR. OAuth authorisation defines technical access and does not replace assessment of the applicable data protection basis.
Google/YouTube permissions
The website initially requests the read-only permission “youtube.readonly” during YouTube sign-in to identify your channel and enable authorised read features. Additional write and moderation features require “youtube.force-ssl” and are requested separately on the website. Google includes broader YouTube management rights in this permission. StreamCendra uses it only for the displayed chat and moderation features you request; the website does not offer video uploads or video deletion. Previously granted permissions may be retained during later sign-in if still valid.
The desktop version uses a separate OAuth client and opens sign-in in your system browser. Its current flow requests read and write permissions together when connecting a YouTube channel. The response returns through a short-lived local callback at 127.0.0.1. Local OAuth tokens on Windows are protected using Windows DPAPI. Website and desktop tokens are stored separately; website sign-in does not automatically sign you in to OBS or transfer OAuth tokens to OBS.
Twitch permissions and chat connection
Initial Twitch sign-in on the website reads your account ID, display name and channel name to identify your account. It requests neither email access nor additional chat or moderation rights. The relevant permission is requested only for an additional feature you choose: “user:write:chat” for sending chat messages, “moderator:manage:chat_messages” for deleting messages, and “moderator:manage:banned_users” for timeouts and bans. “user:read:moderated_channels” checks which channels you moderate. “moderation:read” is used when the channel owner enables synchronisation of their moderator list.
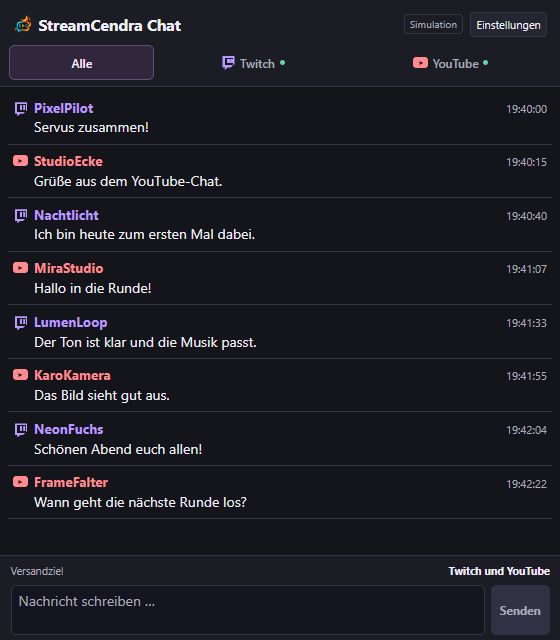
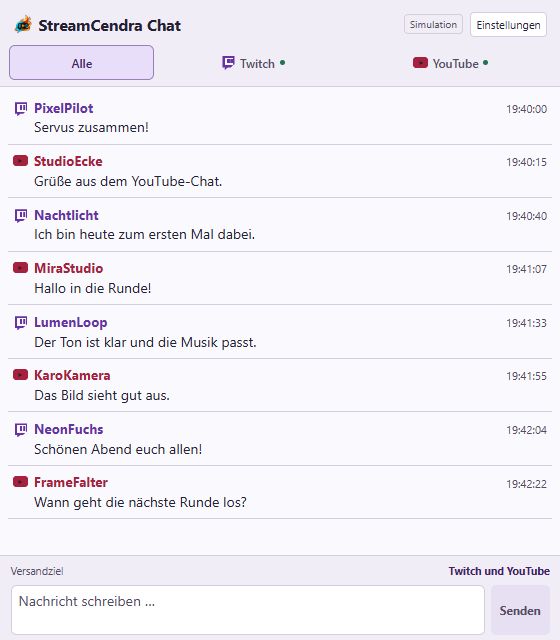
Chat display processes authorised Twitch messages and events through the connected chat source. This includes message and channel IDs, display names, text, timestamps, reply references, and available moderator, VIP, subscriber and other badges. Deletion and ban events are used to update the view. Whispers are not requested. A displayed badge does not grant extra permissions; chat access and platform actions are checked separately against your identity, channel permission and actual role.
The desktop version uses a separate Twitch OAuth registration with device-code authorisation in the system browser. It needs chat read and write permissions; the consent shown there may include additional permissions for its other channel, moderation, community or statistics features. Its local OAuth tokens are protected with Windows DPAPI. The website does not request a Twitch stream key or start streams. Only chat and status data authorised for the web console are transmitted through the separate gateway connection. Removing a website connection therefore does not automatically remove the local desktop connection.
Mod Console, team roles and badges
Moderators use their own connected platform accounts. Each visible chat requires a matching platform identity and valid channel permission. Channel owners can authorise individual platform IDs or enable moderator-list synchronisation. Twitch requires the additional “moderation:read” permission to read the owner’s moderator list. On YouTube, the channel owner must authorise the moderator query; the website also verifies the associated live broadcast. Stored information includes platform ID, display name, channel, role and permission source. Permission proofs are rechecked during use after no more than one minute.
StreamCendra distinguishes channel owners, Head Mods, moderators, question helpers and chat viewers. Owners may allow Head Mods to manage lower team roles and revoke that delegation. Authorised team managers can see members’ platform IDs, display names and roles. An internal moderator or Head Mod appointment does not change a person’s status on YouTube, Twitch or another platform. The documented YouTube API does not provide a separate Head Mod status; platform roles and badges are displayed only to the extent supplied by the source.
Replies, message deletion, timeouts and bans additionally require the relevant platform permission and a verified platform role. Questions can be marked, assigned or edited according to the internal role. The Mod Console displays only authorised active chats from a connected OBS source. Authorised chat and status data travel from the desktop through the gateway to the web server and permitted team members. OAuth tokens are not disclosed to other team members.
OBS connection ID and private key
Once released, you can create a stable connection ID and private OBS key for the profile linked through your platform sign-in. The key is stored encrypted, with an additional hash for access verification. Stored data also includes linked device IDs, device names supplied by you or the plugin, creation and revocation times, and authorised channel, broadcast and live-chat mappings. This data supports automatic OBS pairing and remains stored until a valid data or account deletion request is completed. Disconnecting a device or connection revokes access but does not automatically delete its status records. Renewing the key invalidates the old key and revokes existing device access. Platform passwords and website OAuth tokens are not sent to OBS through this connection.
Chat commands and OBS overlays
When the feature is enabled, verified channel owners can configure chat commands and timers. Stored data includes the channel and account link, command names, response text, timer intervals, display and audio settings, uploaded PNG/JPEG/GIF images and MP3/WAV/OGG audio files. Settings and media remain stored until removed as part of a valid data or account deletion request. Removing a command does not automatically delete previously uploaded media.
For each new matching chat command, the triggering username, platform and any command arguments are processed for the configured outputs. Automated chat responses are sent to the relevant platform through the connected channel account. OBS events are not archived in the database and are available only for their display duration, at most 60 seconds. Private OBS source links grant read access to the associated overlay and images; they do not allow account management. Their access key is in the URL fragment and can be revoked by renewing the links. Displaying an overlay on stream makes its visible content available to the audience. The public preview sends no chat responses and does not upload selected images to the server.
Administration and installer files
Administrators authorised on the server are identified by verified Twitch or YouTube IDs. They can view service status, account counts and user profiles containing display name, platform IDs, connections, creation time and active session count. The admin area does not expose OAuth tokens or session keys. It is used to operate and support the service and is not publicly available.
For installer drafts we store the file, filename, size, SHA-256 checksum, version, compatibility information, notes, time and link to the administrator who created it. Uploads stay private. DEV releases can only be retrieved by authorised administrators; a stable release becomes publicly available only after explicit selection and download permission is enabled. The creator link is removed when the account is deleted. Release files and metadata remain until removed by the operator; valid personal-data deletion requests are assessed separately. The private DEV view uses synthetic data and does not change real user accounts, chats or OBS output.
Storage and retention
Web OAuth tokens are encrypted in the server-side account database. Account links and manual team permissions remain until removed or the account is deleted. Sessions end after at most seven days and incomplete sign-in attempts after ten minutes; expired entries are regularly removed while the service is running. Imported moderator permissions are renewed regularly and are not used to grant access without valid proof. Stored metadata retrieved from YouTube is refreshed within 30 days if still needed, or deleted otherwise; OAuth tokens are retained only for a connection that remains requested and valid.
The website does not maintain a permanent chat-text archive. Messages are shown in a limited live gateway and browser view. After access is revoked or a stream ends, the display is removed on the next update. Action logs may contain a channel, pseudonymous actor identifier, target and message IDs, time, action and result. Completed entries are pruned during subsequent use after 90 days; unresolved actions remain until clarified. Local chat history, marked questions or moderation history may also exist on the desktop user’s computer and must be removed there separately.
For stored Google/YouTube API data, the shorter refresh and deletion periods take priority over general log retention. This does not delay an earlier valid deletion request.
Recipients and international processing
Platform data is sent to Google/YouTube or Twitch services as required for the feature you initiate; for example, sending or moderating transmits chat text and target identifiers to the relevant platform. Platforms process sign-in, connection and usage data under their own terms. This may include transfers to the USA or other countries outside the EEA. Details of the platforms’ controllers, processing locations and transfer safeguards are available in the
Google Privacy Policy
and the
Twitch Privacy Notice.
Access to authorised data is limited to people needed to operate or support the service and channel teams you authorise. We do not sell Google/YouTube or Twitch user data or use it for advertising, profile trading or training general-purpose AI models. The use and transfer of information received from Google APIs follow the
Google API Services User Data Policy, including its Limited Use requirements. Support access to specific accounts or messages requires your express permission unless necessary for security or required by law. Legally required disclosures remain possible.
Cookies and local preferences
Once sign-in is enabled, the “sf_flow” and “sf_session” cookies secure the sign-in flow and session and cannot be read by JavaScript. Their maximum lifetimes are ten minutes and seven days respectively. “sc_language” remembers your selected language for up to one year. Language, colour theme and Mod Console layout may also be stored locally in your browser until you remove them or clear browser data. This storage serves sign-in and settings you choose. No analytics, advertising or social-media tracking services are embedded. External platform pages are opened only when you open a connection or link.
Revoke connections and delete data
You can remove an additional sign-in connection in the account area; the last sign-in is currently protected there. This deletes that connection’s stored tokens but does not automatically revoke platform consent at Google or Twitch. Also revoke it through
Google account connections
or
Twitch connections. Desktop authorisations must be disconnected separately in the desktop version or at the provider. Revoking consent makes the affected connected features unavailable.
To delete your whole account or stored Google/YouTube data, email
office@pos-it.at with the subject “StreamCendra data deletion” and the affected platform/channel ID. Do not send passwords or tokens. We reasonably verify your authority and delete associated Google/YouTube data following a valid request as soon as possible, within seven calendar days at the latest. Once we learn of a revocation, we stop the affected use and handle the associated data deletion accordingly. Other data that must be retained by law is restricted to that purpose. Deletion at StreamCendra does not delete content directly on YouTube or Twitch.
Your data protection rights
Subject to applicable law, you have rights of access, rectification, erasure, restriction of processing and data portability. You can withdraw consent at any time with future effect. You may object to processing based on legitimate interests on grounds relating to your particular situation. Contact
office@pos-it.atto exercise these rights. You may also complain to a competent supervisory authority, including the
Austrian Data Protection Authority, Barichgasse 40-42, 1030 Vienna.
Providing platform data is voluntary but necessary for the connected feature concerned. Without authorisation, you can still use the public website and preview. We do not make solely automated decisions with legal or similarly significant effects. Technical role checks only restrict access to authorised features. Changes to this notice are published with an updated version; new purposes requiring consent are authorised before the relevant processing begins.
Back to home
WEBSITE, ACCOUNTS & MODERATION
Terms of use
Last updated: 22 November 2026 · Version 1.0
These terms describe the StreamCendra website and its online features. Real sign-in and public installer downloads are currently disabled. Account connections, chat and moderation describe features that become usable only after separate enablement. The preview does not perform real platform actions.
Provider and scope
The provider is Pos-IT e.U., owned by Benjamin Pos, Herbststraße 71-75/8/2, 1160 Vienna, Austria. Contact:
office@pos-it.at. Further company details are available in the
Pos-IT e.U. legal notice.
These terms cover the website, account area, Mod Console and their connection to the desktop version. They do not replace a separate software licence for an OBS plugin, desktop app or installer. Simply visiting the website does not constitute acceptance of an account agreement. Before account registration is enabled, the applicable terms will be provided for review and any required express acceptance.
Costs and current availability
StreamCendra is provided free of charge. No paid subscription is currently entered into through this website. You are responsible for any hardware, internet access or external platform costs. The preview uses labelled example data only. Describing planned platforms or features does not guarantee their availability; the enabled feature set determines what is available.
Accounts and platform connections
Once enabled, sign-in is intended for moderators and other users as well as channel owners. Connect only accounts you are authorised to use. Additional sign-in identities are associated with the same StreamCendra account only through an explicit linking action. Connecting a platform or signing in does not by itself grant access to other channels’ chats or confer moderator rights. You must meet the relevant platform’s terms and age requirements.
StreamCendra uses YouTube API Services for its YouTube features. Use of these features is also subject to the
YouTube Terms of Service. Twitch use is subject to the
Twitch Terms of Service. StreamCendra is an independent service of Pos-IT e.U.; this does not imply endorsement or certification by a streaming platform.
Permissions and actions you initiate
Additional chat and moderation features require appropriate OAuth permissions and actual rights in the affected channel. Granting a Google scope does not make you a moderator. The website requests additional YouTube write access separately from its initial read permission; the current desktop connection flow requests both together. Website sign-in and desktop authorisations are separate. Before sending, deleting, banning or changing roles, check the displayed account, channel and target person. Choosing a tool authorises only the action shown, not unrelated platform actions.
On the website, sending Twitch chat messages, deleting messages, timeouts, bans and checking which channels you moderate require the appropriate additional permissions. Only the verified channel owner can enable moderator-list synchronisation. Twitch authorisation does not replace your actual channel role or StreamCendra channel permission. The website does not appoint Twitch moderators or grant Twitch VIP roles. The desktop version has its own connection and may request a different permission set for its available features. Platform consent can be revoked in Twitch connection settings; simply signing out only ends the relevant StreamCendra session.
Connecting your OBS devices
The web profile does not require an additional password-based registration; it is linked through your signed-in platform account and any other accounts you explicitly connect. Once released, you can create a private OBS connection key for use with a compatible plugin version. Connecting authorises linking your OBS devices and chat sources to your own verified platform channels. The key grants no rights over other channels and does not replace platform authorisation. Do not share it with moderators or other people. You can disconnect devices or renew the key to revoke previous access. Website sign-in, local platform sign-ins and permission for individual chat or moderation actions remain separate steps.
Automated chat commands and OBS
Once released, the verified channel owner configures commands and timers for their channel. Saving an enabled chat command instructs the service to send its automatic chat response and/or OBS output for matching new chat messages. Chat response, image including GIF, OBS text and audio have independent switches. An enabled timer instructs the service to send regular chat messages at the configured interval; it requires no triggering message or OBS browser source. Sending pauses while the stream is inactive or chat is disconnected; missed timer messages are not replayed. Execution requires an active, authorised chat source and the necessary platform permissions. Chat responses are sent by the connected channel account; the platform controls its sender name and native chat appearance. OBS output uses a browser source. This feature does not switch OBS scenes or remotely control local OBS sources.
Use only images, GIFs, sounds and text that you have the necessary rights to use and publish. Check commands, placeholders, timer intervals, display duration, volume and output channels before enabling them, and avoid spam. Keep OBS source links private and renew them if shared accidentally. A source link does not replace platform permission. The labelled account preview runs no real commands or timers.
Moderation and team roles
Within StreamCendra, channel owners may appoint Head Mods, moderators, question helpers and chat viewers for their channel. Head Mods may manage lower roles only if the owner explicitly allows it; appointing Head Mods and granting delegation remain reserved to the owner. Authorised team managers can access the team data needed for that purpose. An internal appointment does not change a role on YouTube, Twitch or another platform. Current team management therefore does not automatically appoint anyone as a moderator on a streaming platform.
Platform roles are imported only where they can be reliably verified through the relevant API. The YouTube API does not supply a separate Head Mod status. Roles and permissions are channel-specific and may be revoked by an authorised person. A role on one channel or platform does not automatically apply to other channels or services. Question management, chat display and moderation remain limited to the tools authorised for that context.
Permitted use and content
Use StreamCendra only in accordance with applicable law and your permissions. Unlawful content, harassment, spam, malware, attacks on the service, bypassing access controls and using another person’s credentials without permission are prohibited. Use chat and team data only for the authorised channel purpose. Do not publish or export personal data without appropriate permission and a legal basis. Channel owners remain responsible, within applicable law, for processing they initiate and the team members they select.
Rights in trademarks, logos, software and content remain with their respective holders. Using the website does not transfer ownership or trademark rights. You retain rights in your own content. To perform a feature you request, the necessary content may be technically processed and transmitted to the selected platform or authorised channel team members. No broader permission to use that content is granted.
Administrative release management
Explicitly authorised administrators can manage StreamCendra installers and release information. Upload only files you are entitled to distribute, and check installers, version information and OBS compatibility before publishing. Uploading a file or automatically calculating its checksum does not approve or certify the installer. DEV releases and private test views remain restricted to authorised administrators.
Availability and interruptions
Features may be temporarily unavailable due to maintenance, technical faults, missing platform permissions, API limits or changes to external services. Access may be temporarily restricted where there are specific indications of abuse or security risks. Continuous availability or a particular response time is not promised. The provider’s statutory obligations remain unaffected.
Statutory warranty and liability
Statutory warranty and liability rules apply. Claims for personal injury and damage caused intentionally or through gross negligence are not excluded or limited. Mandatory consumer rights remain unaffected. These terms do not create a blanket exclusion of liability for platform actions or data processing.
Privacy, revocation and ending use
Information about data, recipients, retention, platform authorisations and your rights is provided in the
privacy notice. You may stop using the service and revoke platform consent at Google or Twitch at any time. Removing a connection in StreamCendra does not automatically revoke consent at the provider; website and desktop authorisations must be handled separately. Contact
office@pos-it.atto delete your account or request data deletion. Deleting StreamCendra data does not delete content directly on a streaming platform.
Changes and applicable rights
The date above identifies this version. New or materially changed account features are explained before use; any required new authorisations or contractual acceptance are obtained in advance. Silence or simply visiting the website does not constitute acceptance of new contract terms. Statutory jurisdiction and consumer protection rules remain unaffected.
Back to home